Creating a private social network website is a fantastic way to connect with friends, family, or a specific community in a safe, private space. Whether you’re looking to share posts, photos, videos, or just have private discussions, a private social network can provide the perfect solution. In this guide, I will walk you through the entire process of building your own private social network website for free, using WordPress and a few helpful plugins.
So, here I started with this! I set up my test site on TasteWP to begin building my private social network. TasteWP made it super easy to get started without any complicated setup.
Once I created my site, I received a unique user ID and password. It’s important to save these credentials somewhere safe because they will be needed for future access. If they are lost, recovering the site might not be possible. So, before moving forward, I made sure to note them down securely.

Step 1: Install WordPress
To start, you’ll need a hosting provider and a domain name. Once you’ve got those set up, installing WordPress is simple and only takes a few minutes. Most hosting services have one-click WordPress installation, which makes the process even smoother. Once installed, you can access the WordPress dashboard by logging into your website.
Step 2: Install BuddyX Theme
Once WordPress is installed, the next step is to choose a theme for your private social network. I highly recommend using the BuddyX theme, which is specifically designed for social networking sites. It’s fully compatible with BuddyPress and offers many customization options, making it perfect for creating a private social network.
Features of BuddyX Theme:
- Responsive Design: Your website will look great on any device.
- Customizable: Choose from a range of layouts and settings to match your brand or community style.
- BuddyPress Integration: Seamlessly integrates with BuddyPress for social networking features.
Install the BuddyX theme by going to your WordPress Dashboard → Appearance → Themes → Add New, search for BuddyX, and click Install.

Step 3: Install Required Plugins
- Classic Widgets
- Elementor Page Builder
- Kirki Toolkit
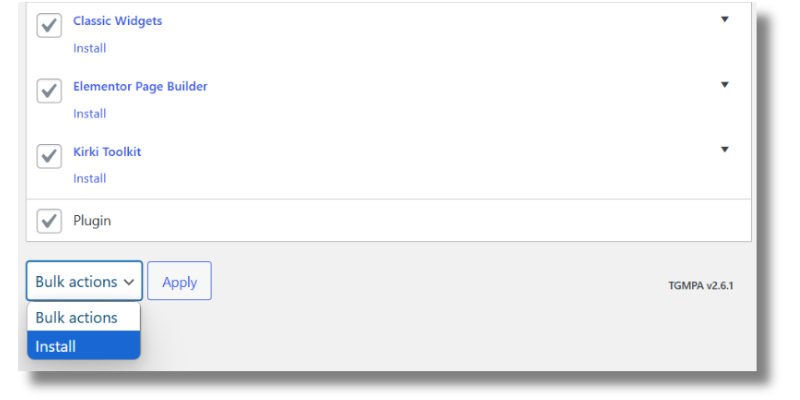
How to Install These Plugins
- Navigate to Dashboard → Plugins → Install Required Plugins
- Select all the listed plugins by checking their boxes.
- In the Bulk Actions dropdown, select Install and click Apply.
What These Plugins Do:
- Classic Widgets: Restores the old WordPress widget settings for easier customization.
- Elementor Page Builder: A drag-and-drop builder to design your site without coding.
- Kirki Toolkit: Enhances customization options in WordPress, especially for themes like BuddyX.
Step 4: Install Social Networking Plugins
Now that your basic setup is complete, you need to install the core social networking plugins. These plugins will enable user profiles, activity streams, groups, and other interactive features essential for a private social network.
What is BuddyPress?
BuddyPress is an open-source WordPress plugin designed to add social networking functionality to your website. It allows you to create a private community where users can interact in various ways, similar to popular social networks. Here are some of its key features:
- User Profiles: Members can create and customize their own profiles with profile pictures, cover images, and personal information.
- Activity Streams: Just like a Facebook timeline, users can post updates, like, comment, and interact with each other’s content.
- Private Messaging: Users can send private messages to one another, fostering direct communication within the network.
- Friend Connections: Members can add friends, create groups, and build their own networks within the community.
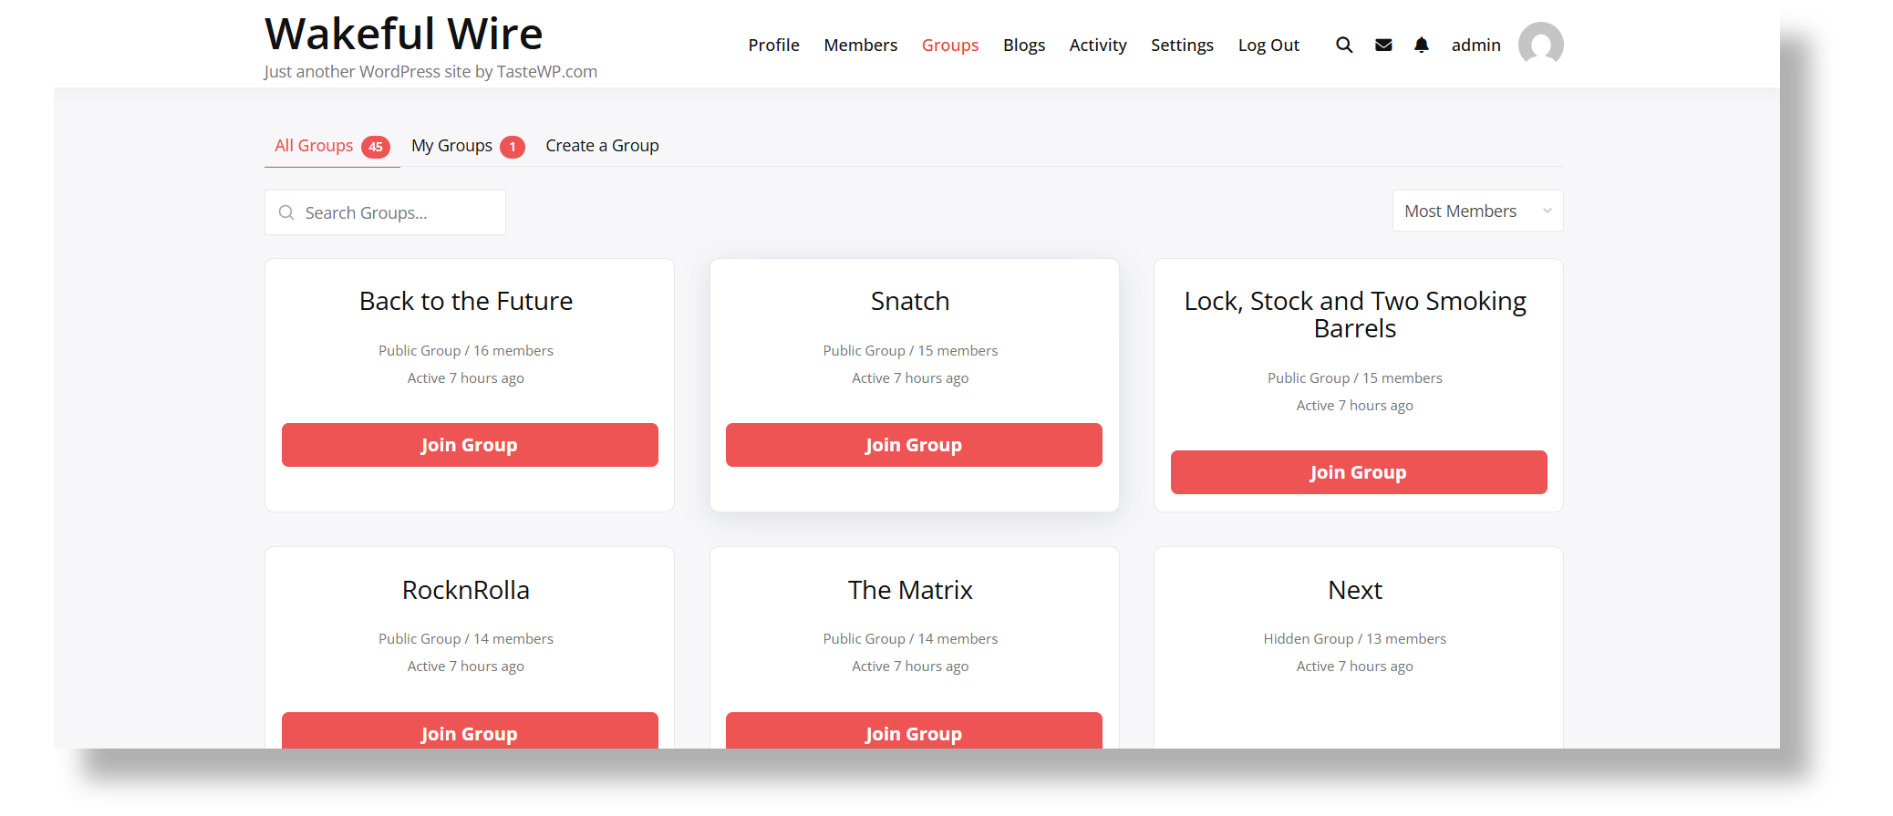
- Groups: BuddyPress allows the creation of public, private, or hidden groups where members can collaborate and share content based on their interests.
- Notifications: Real-time notifications alert users when they receive messages, friend requests, or interactions on their posts.
BuddyPress is highly extensible, meaning you can add more features using additional plugins. Whether you want a simple private network for close friends or a full-fledged online community, BuddyPress gives you the flexibility to build it the way you want.
BuddyPress (Core Social Networking Plugin)
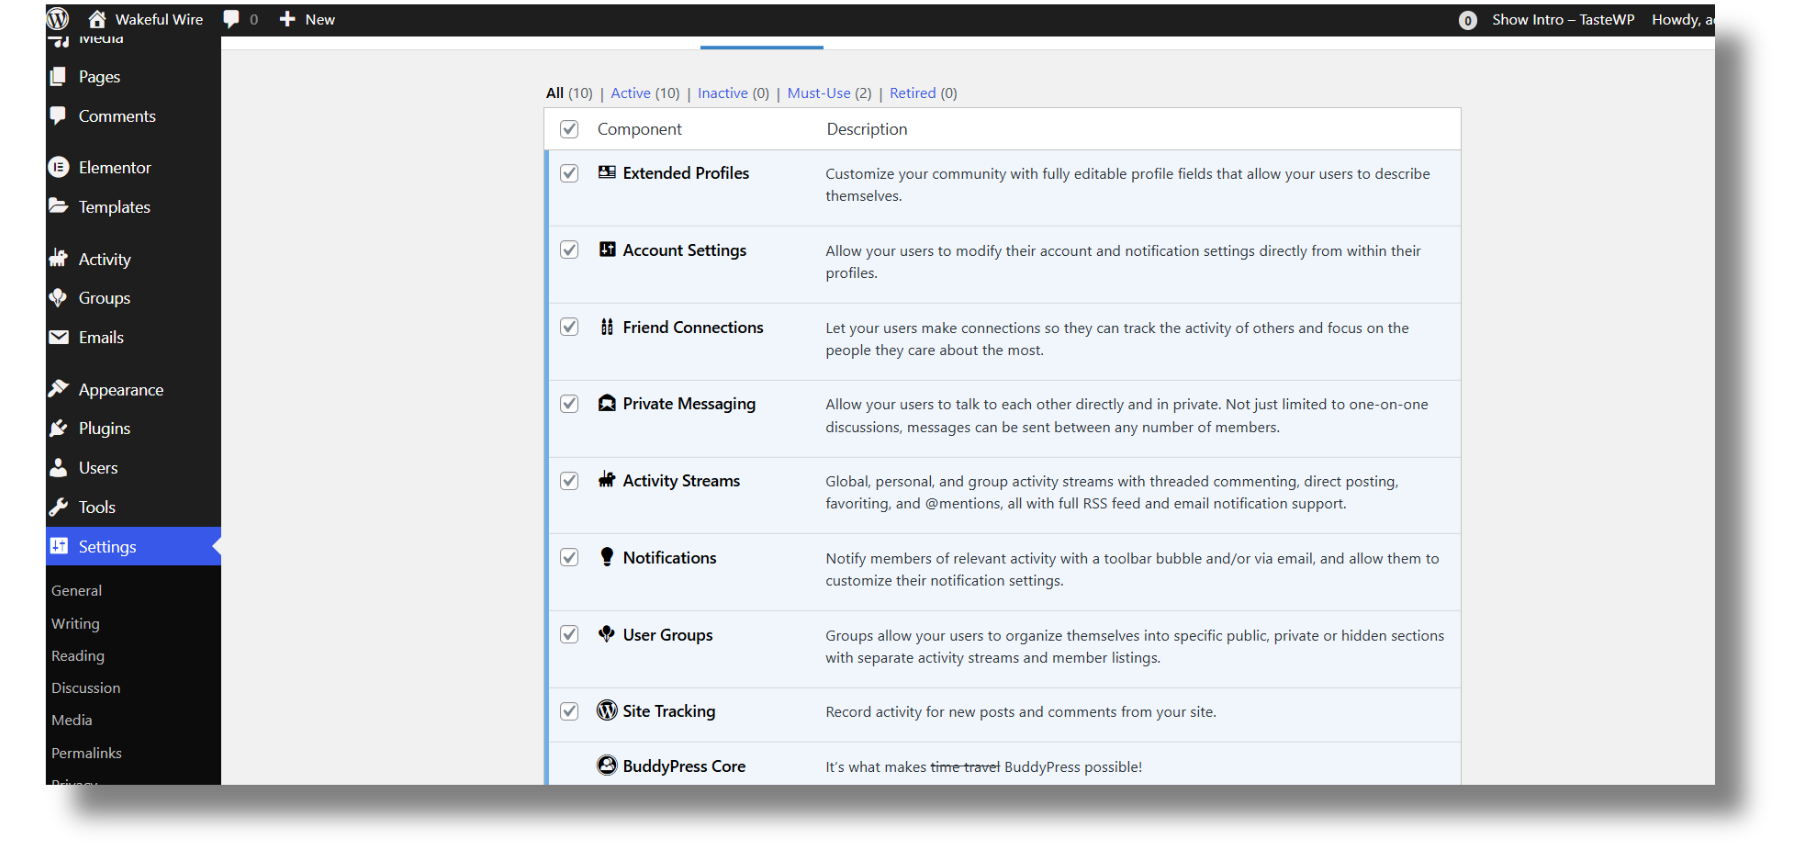
Setup Instructions:
- After activation, go to Settings → BuddyPress to enable or disable components as needed.
BuddyPress Default Data (Add Sample Users & Content)
Once BuddyPress is installed, it helps to have some sample data to see how everything looks and functions. This plugin automatically creates dummy users, groups, and posts, making it easier to test the site before inviting real users.
How to Install BuddyPress Default Data:
- Go to Dashboard → Plugins → Add New.
- Search for BuddyPress Default Data.
- Click Install Now and then Activate.
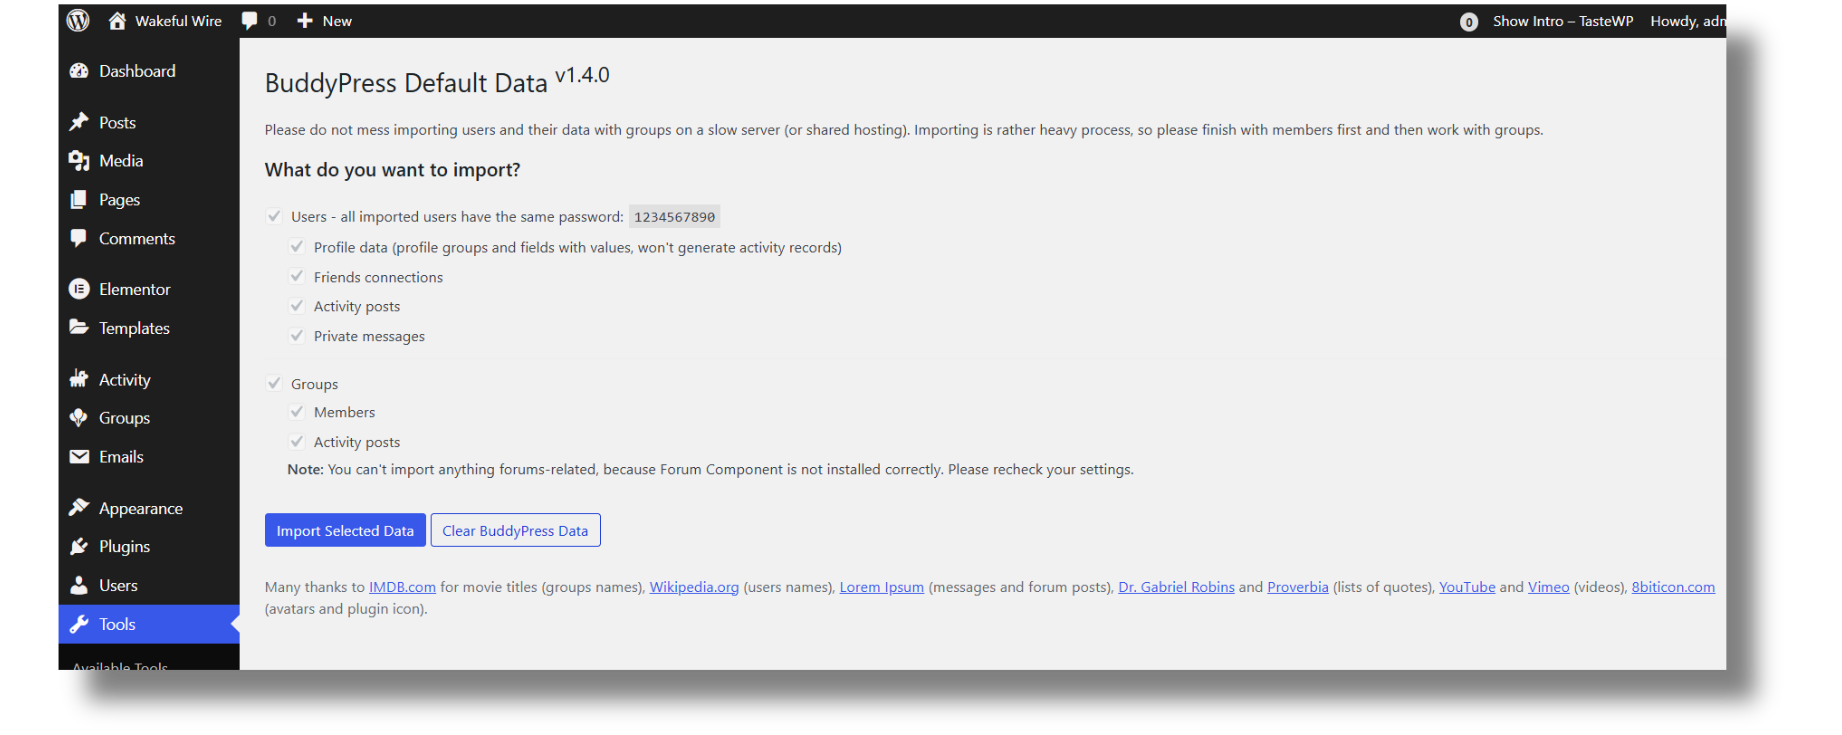
How to Use:
- After activation, navigate to Tools → BuddyPress Default Data and click Import Data.
- This will create sample content like user accounts, posts, and group discussions.
FakerPress (Generate Sample Content for Testing)
FakerPress helps you populate your social network with fake users, posts, and groups so you can see how the site functions before real users join. How to Install FakePress:
- Go to Dashboard → Plugins → Add New.
- Search for FakePress.
- Click Install Now and then Activate.
How to Use:
- After activation, go to Posts → Add New.
- Use FakePress settings to generate sample content.
- This will give you a preview of how your social network will look with active users.
Step 4: Set Up Your Menu
With the plugins installed and activated, the next step is to customize the navigation menu. This ensures that visitors can easily access the different sections of your social network.
- Go to Dashboard → Appearance → Menus.
- Select the Primary Menu option.
- For the first menu, I named mine “Main Menu.” Here, you can choose the pages that will appear in the header. Typically, you’ll want to include pages like Home, Blog, and Groups. Select these options and click Save Menu.
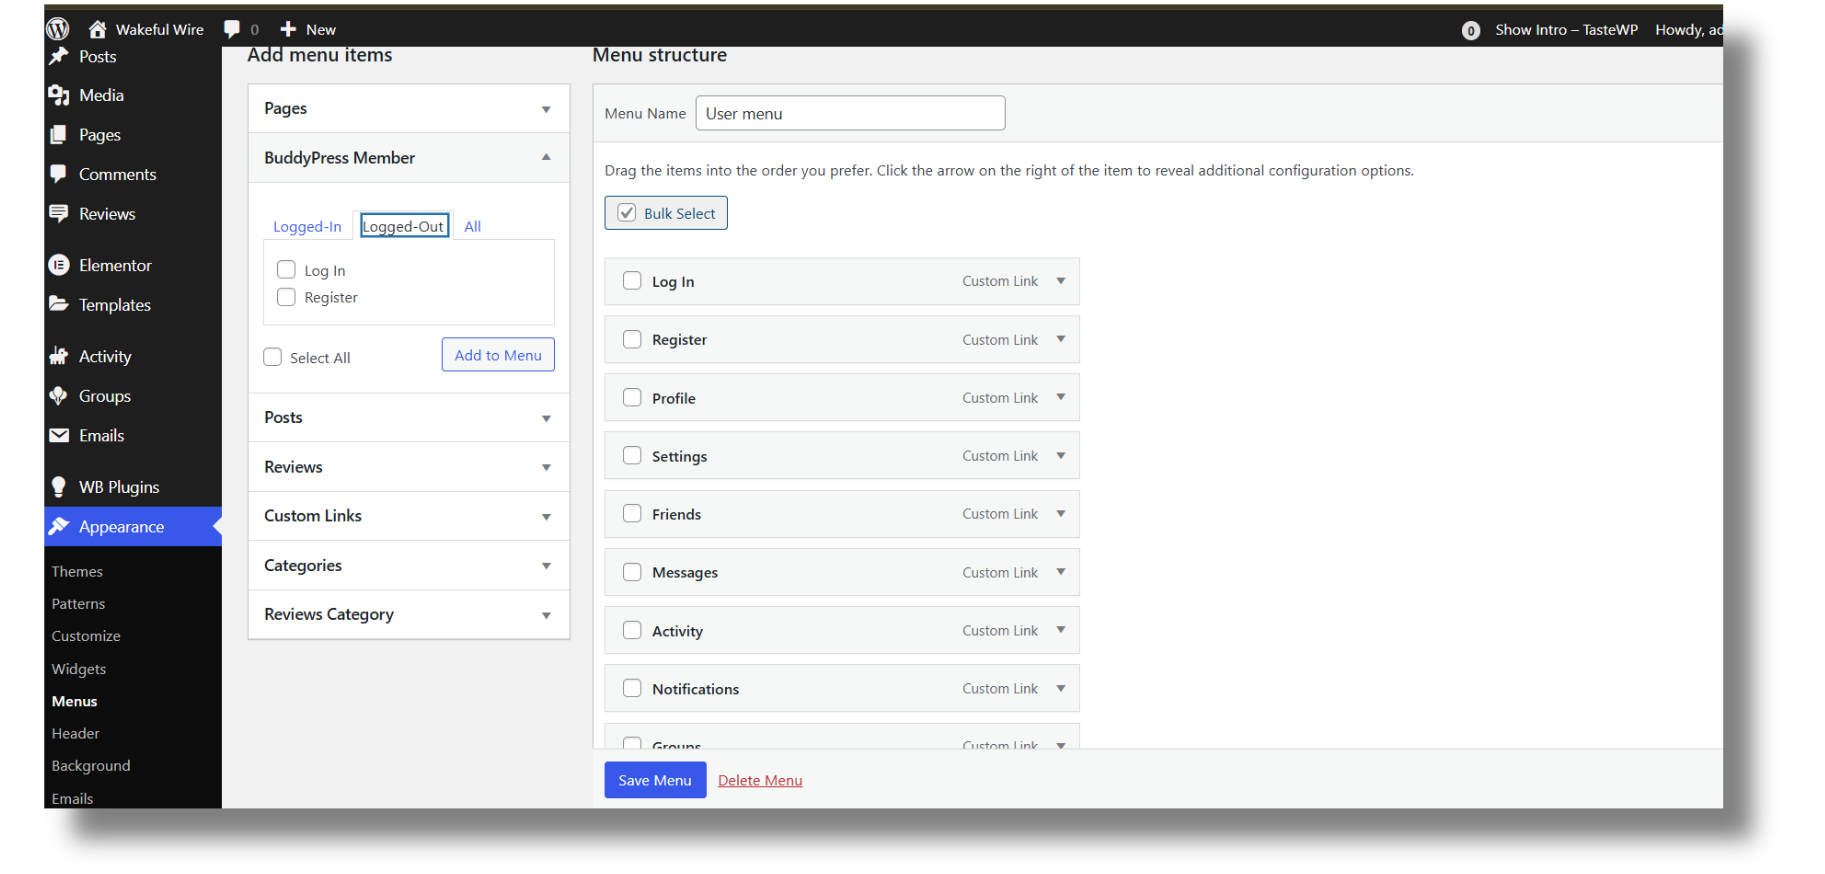
- Next, create a User Menu. This menu will include options like Profile, Messages, and Settings. Simply check the boxes for each option and save it.
Step 5: Customize Your Social Network
Now that the structure of your private social network is in place, it’s time to personalize it! This is where you make your platform truly reflect your vision, ensuring it looks and feels exactly how you want. WordPress gives you a ton of customization options—allowing you to tweak the layout, colors, fonts, and overall design to match your brand or community vibe.
Accessing the Customization Panel
To start customizing, head over to your WordPress dashboard and navigate to:
Dashboard → Appearance → Customize
This will open the WordPress Customizer, where you’ll find multiple sections to fine-tune your site’s appearance. Let’s go through some of the key settings you’ll want to adjust:
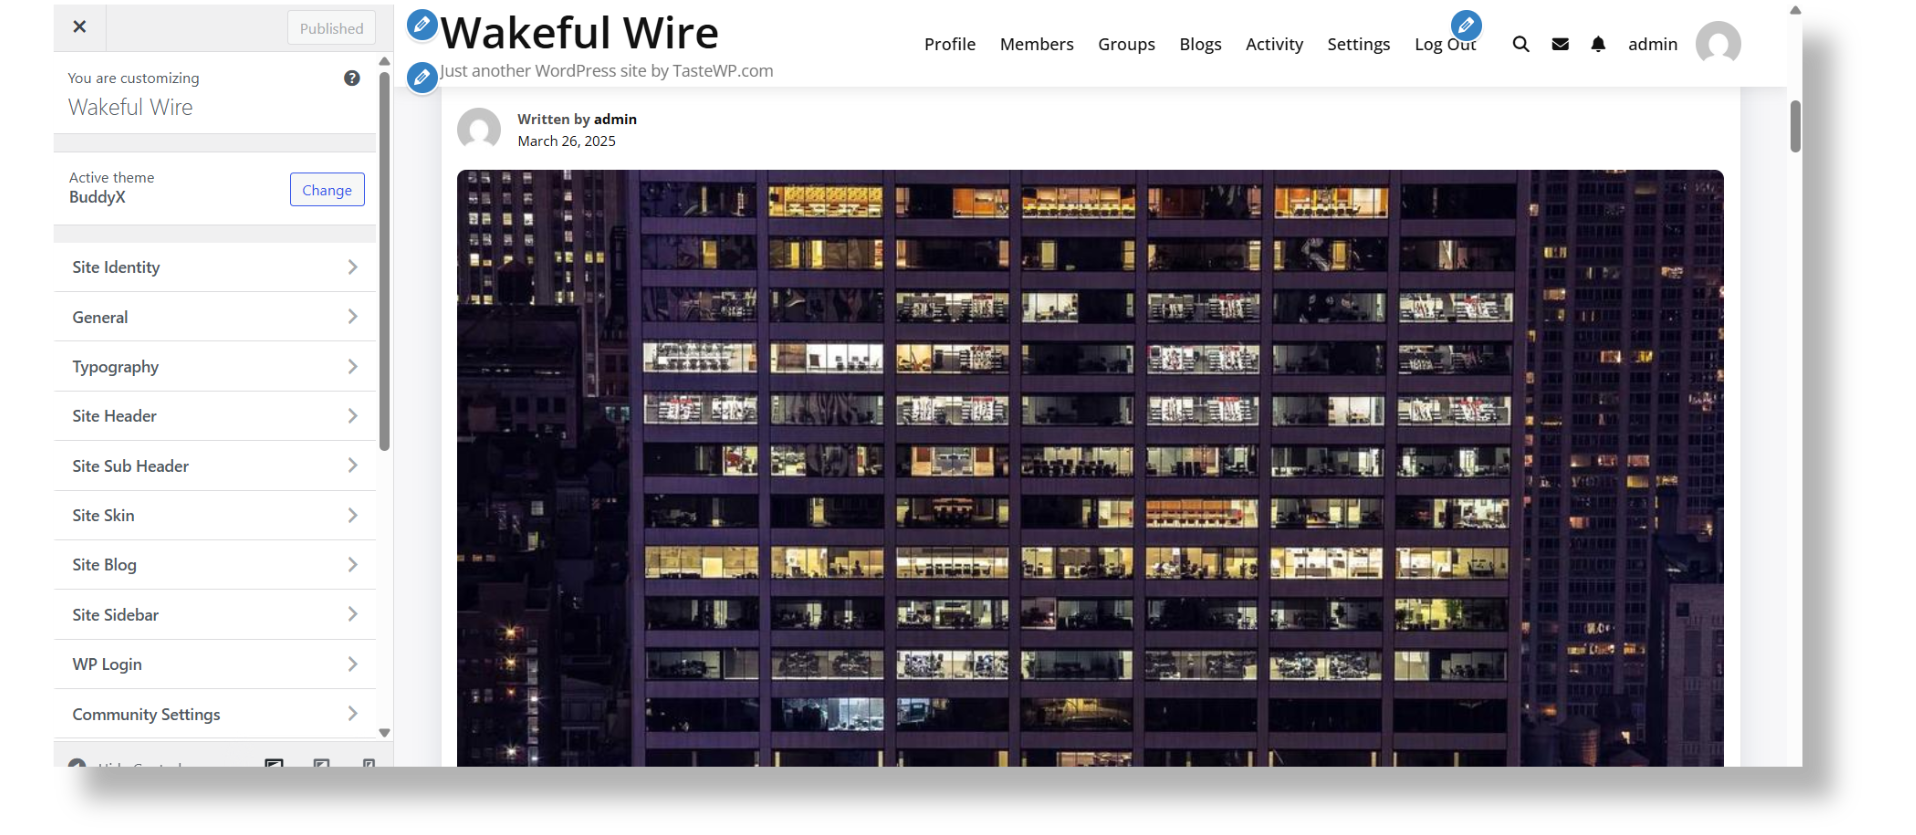
1. Site Identity
In the Site Identity settings, you have control over how your website is branded and appears in different places, including browser tabs and search results. Let’s go through the key options:
Logo
Right now, no logo has been selected. If you want to personalize your website with a logo that represents your brand, you can click on “Select logo” and upload an image. A well-designed logo can make your site look more professional and memorable.
Site Title & Tagline
The Site Title is set to “Wakeful Wire”, which is the name of your website. This is displayed prominently at the top of your site. Right below that, the Tagline is set to “Just another WordPress site by TasteWP.com”, which is a default placeholder text. You might want to change this to something more unique that reflects what your website is about—like a catchy slogan or a brief description of your content.
There’s also an option to Display Site Title and Tagline, which is currently checked. This means that both the title and tagline are visible on your site. If you upload a logo and prefer a cleaner look, you can uncheck this to hide the text.
Site Icon (Favicon)
No Site Icon (favicon) has been selected yet. The site icon is what appears in browser tabs, bookmark bars, and mobile apps. It should be a square image of at least 512×512 pixels. Adding a favicon enhances your site’s branding and makes it more recognizable when visitors have multiple tabs open.
Customization Options
You can change any of these settings at any time to match your brand identity. Whether you want a logo, a custom tagline, or a unique site icon, these options allow you to tailor the look and feel of your website to your preferences.
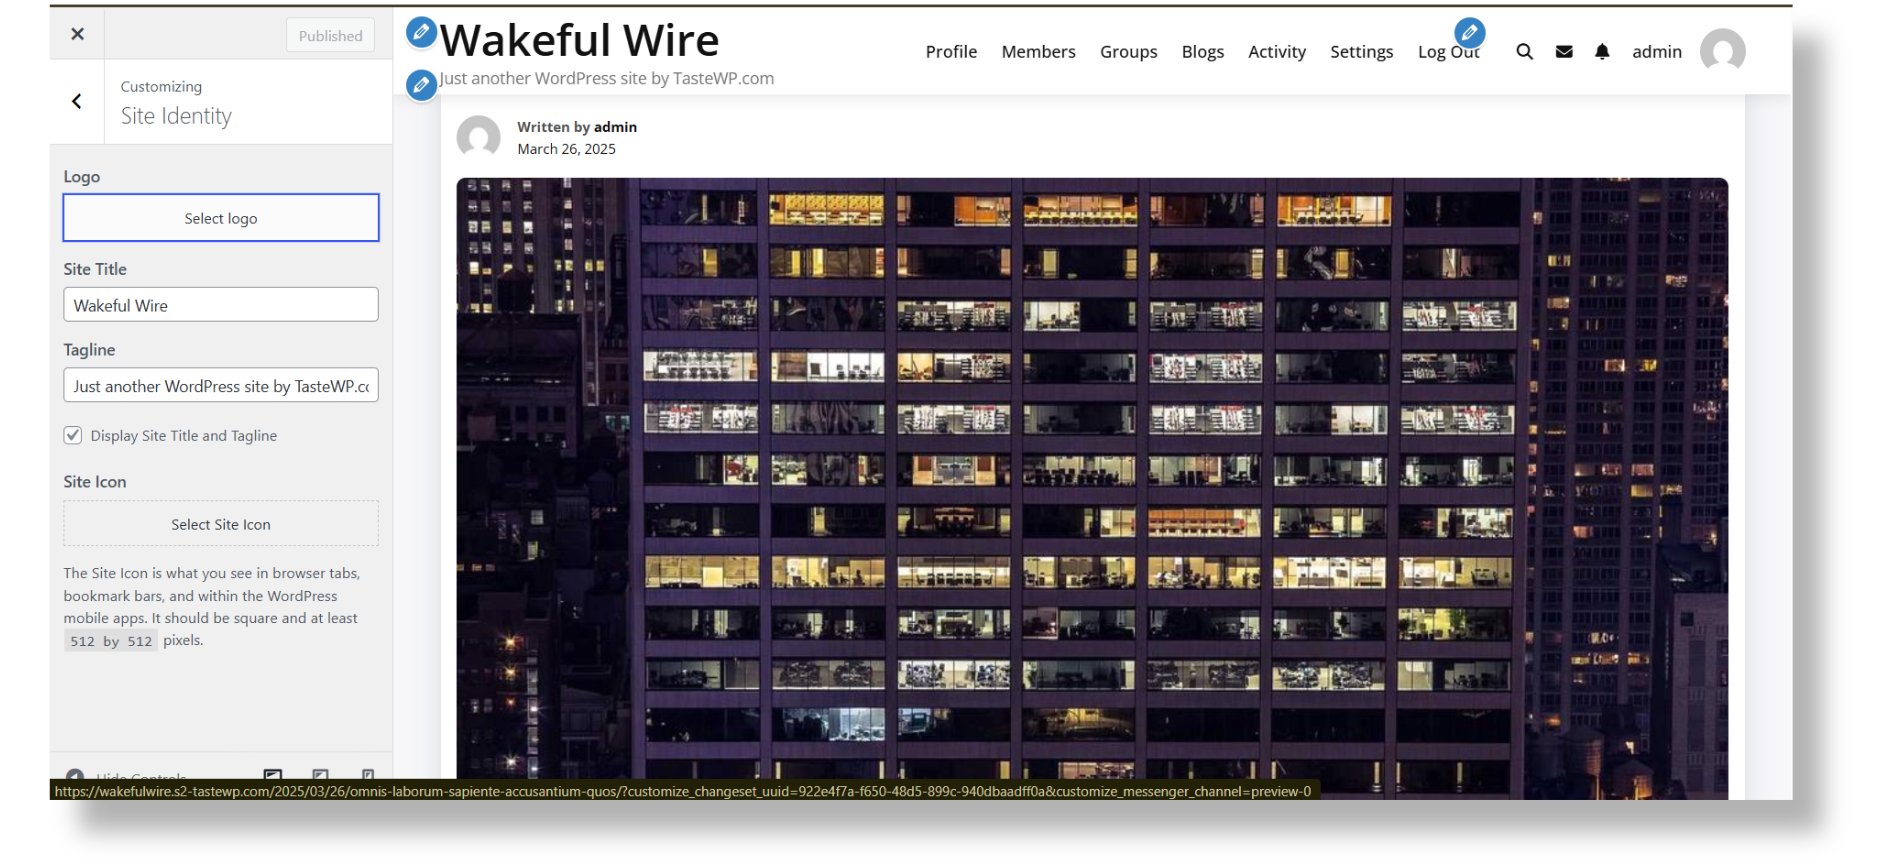
2. Site Layout
In the Site Layout settings, the selected layout is the full-width boxed style, meaning your content is structured within a contained space but still spans across the screen neatly. This layout is great for maintaining a balanced and professional look while ensuring readability. However, you can change this as per your preference to better suit your design goals and user experience.
Now, let’s talk about the content width—it’s set to 1170px, which means your site’s main content area will not stretch beyond this width. This helps keep everything well-aligned, preventing an overly wide layout that might make reading difficult, especially on larger screens. If you prefer a more compact or expansive layout, you can always adjust this setting.
When it comes to the design aesthetics, there are some subtle but effective tweaks:
- The Global Border Radius is set to 8px, adding slightly rounded corners to various elements like cards and sections. This gives your site a modern and polished feel instead of sharp, rigid edges.
- The Buttons Border Radius is set to 6px, meaning all buttons will have smooth, rounded corners rather than being completely rectangular. This small design choice makes the buttons look more visually appealing and user-friendly.
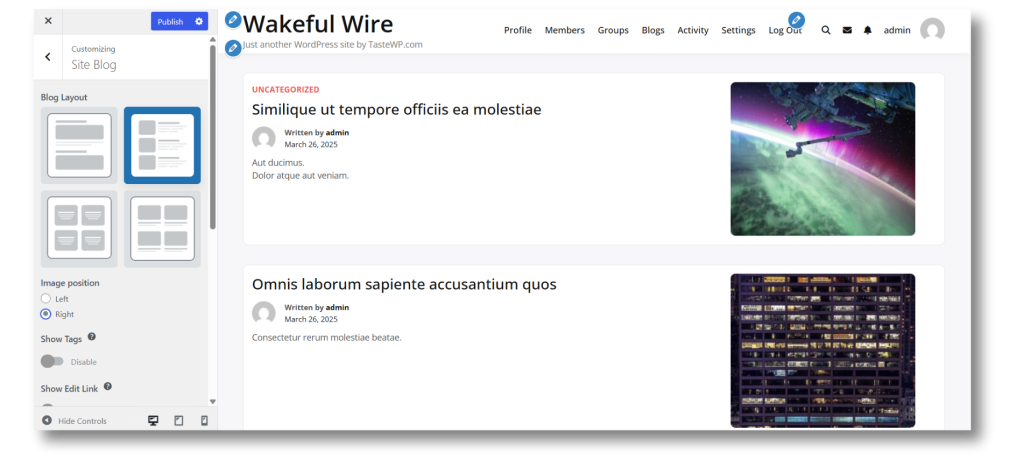
3. Site Blog
In the Site Blog settings, the chosen layout is the list style, where blog posts are displayed one after another in a vertical format. This keeps things clean and easy to read, especially for a social network where updates and discussions are frequent.
For the image position, the right-side placement is selected. This means that each blog post will have its featured image neatly aligned to the right, keeping the text as the primary focus while still making the visuals stand out.
Looking at the additional settings:
- Show Tags is currently disabled, meaning category or tag labels won’t appear under blog posts. This keeps the layout uncluttered, but you can always enable it later if you want users to navigate through tagged topics easily.
- Show Edit Link is also disabled, so the edit option won’t be visible on the front end for users. This can be useful if you don’t want members to see an edit button on posts, keeping the interface simple and distraction-free.
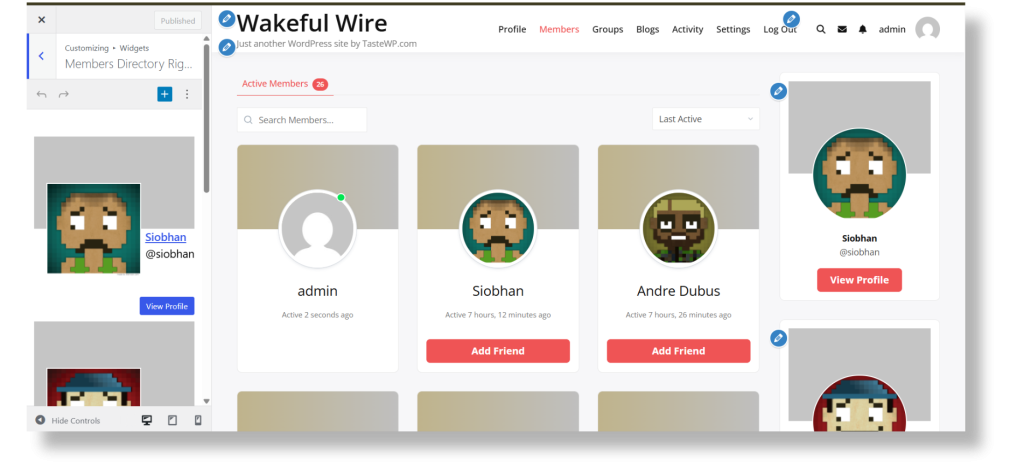
4. Widgets & Sidebars
Go to Widgets and select Members Directory Right Sidebar. Here, you will find an Add (+) button, allowing you to insert various widgets. This feature provides flexibility in designing an interactive and user-friendly directory.The search bar allows users to find specific members, while the filter dropdown helps sort by activity status. The sidebar on the left includes a custom widget area, where additional elements like featured members or recent activity can be added to enhance the user experience.
Note: If you want to enable BuddyX Theme features in your sidebar, you must deactivate the Classic Widgets plugin. Otherwise, your website will continue displaying the old theme settings instead of the new BuddyX Theme functionalities.
How to Disable Classic Widgets:
- Go to your WordPress dashboard.
- Navigate to Plugins → Installed Plugins.
- Find Classic Widgets in the list.
- Click Deactivate.
Final Look: Bringing It All Together
Now that we’ve customized various aspects of the website, let’s take a look at the final results. Below are the key elements that have been refined and how they contribute to an improved user experience and site aesthetics.
1. Site Identity – Branding & Recognition
The logo has been integrated (if uploaded) for a professional look. The Site Title & Tagline have been customized to reflect the website’s purpose. A Site Icon (Favicon) has also been added for brand consistency in browser tabs.

2.Menu (Primary and User Menu)
Here is the final look at the website’s navigation structure. The Main Menu (Primary Navigation) at the top provides quick access to essential sections like Profile, Members, Groups, Blogs, Activity, Settings, and Log Out. Meanwhile, the User Menu (Header Dropdown Menu), located under the profile icon, offers personalized options such as Profile, Settings, Friends, Messages, Activity, Notifications, and Groups. Together, these menus create a seamless and efficient browsing experience, ensuring easy access to both general and user-specific features.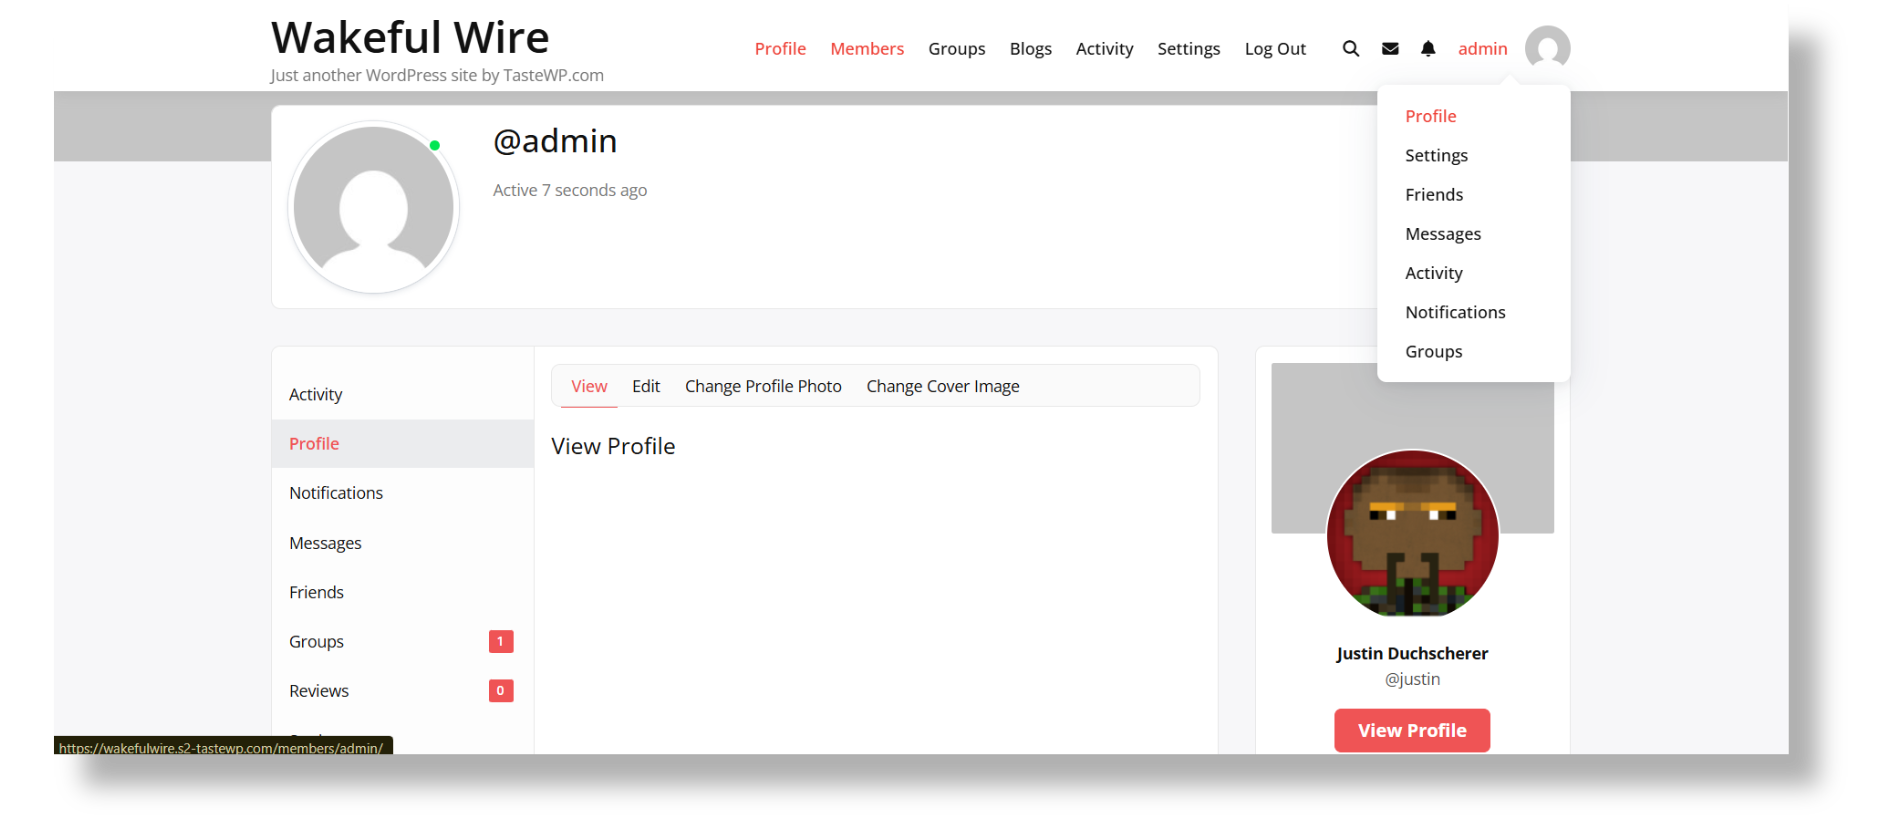
3. Site Layout – Structured & Modern Design
The Full-Width Boxed Layout ensures a balanced content presentation. The content width is set to 1170px, providing optimal readability. A Global Border Radius of 8px and a Button Border Radius of 6px create a smooth, modern aesthetic.
4. Site Blog – Organized & Engaging
Blog posts are displayed in a list-style layout, making scrolling and reading easier. Featured images are positioned on the right, maintaining a clean look. A minimalist approach has been followed by disabling tags and edit links to keep the reading experience uncluttered.

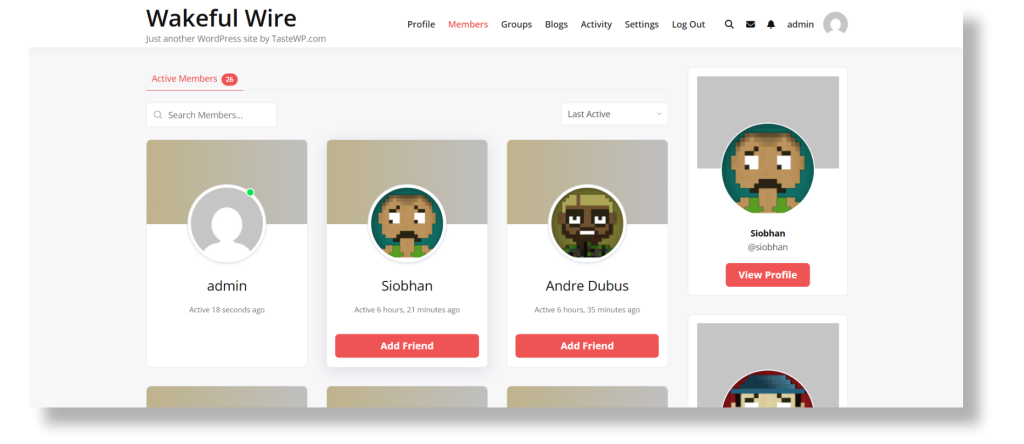
5. Widgets & Sidebars – Enhanced Navigations.
The image represents the final look of the Members Directory section of a WordPress website using the BuddyX Theme. It features a visually appealing grid layout where each profile card displays the member’s avatar, name, last active status, and an option to add them as a friend. At the top, a search bar allows users to quickly find specific members, while a filter dropdown enables sorting by activity status. Additionally, the right sidebar includes an enlarged profile card with a “View Profile” button, providing quick access to member details.
Start Building Your Private Social Network Today!
With your private social network fully set up, you now have a secure and engaging space where members can connect, share, and interact. By using WordPress, BuddyX, you’ve created a feature-rich community platform—without any cost!
From setting up user profiles and activity streams to customizing the design and adding review features, you’ve tailored the network to fit your vision. Whether it’s for close friends, or a niche community, your social network is now ready to grow and thrive.
With endless customization options, you can style your website to reflect your unique vision—whether it’s a sleek, modern design or a warm, community-driven feel. Use widgets, layouts, and branding elements to make your network truly yours and provide the best experience for your member.