Creating an online course can be a game-changer for educators, entrepreneurs, and professionals alike. It’s an opportunity to share your expertise, build an engaged community, and even create a scalable revenue stream. The digital learning space is thriving, and learners across the world are actively searching for high-quality, accessible courses in nearly every subject imaginable—from coding and design to wellness, language, marketing, and beyond.
But before you even think about hitting record or drafting your first lesson outline, there’s a critical phase that lays the foundation for long-term success: planning.
Planning isn’t just about jotting down a few ideas—it’s a deep dive into what you want to teach, who you want to reach, and how you’ll guide them from point A to point B. Without this groundwork, even the most beautifully designed courses can fall flat. Planning determines the clarity of your message, the quality of your materials, the flow of your modules, and ultimately the impact your course has on learners.
You need to think strategically. What skills or knowledge will your students gain? What makes your course different from the hundreds already available online? How can you keep learners engaged from start to finish?
This guide walks you through every step of that process, from conceptualization to the initial setup of your course platform. Whether you’re a seasoned subject matter expert or a complete beginner stepping into digital education for the first time, careful planning ensures your course not only gets completed but also delivers real value to learners. It’s not just about having the right tools—it’s about having a rock-solid plan that makes your course effective, accessible, and truly transformative.
Start with Why: Define Your Purpose
Before anything else, ask yourself a simple but vital question: Why do I want to create this course?
Understanding your motivation is the foundation of your course’s direction. Without clarity on why you’re doing this, it’s easy to lose focus midway or create something that doesn’t resonate with your audience. Your “why” influences not just what you teach, but how you teach it, who you teach it to, and the value proposition you offer.
Some common reasons to start creating an online course include:
- Establishing expertise in a niche: Sharing your unique insights and knowledge can help you become recognized as a thought leader. Whether you’re a developer, designer, coach, or consultant, a well-crafted course can build your reputation and increase your credibility.
- Generating passive income: Courses can be a sustainable revenue stream, especially when designed for long-term value. If you create evergreen content that continues to meet demand, it can bring consistent income with minimal ongoing effort.
- Expanding a larger educational brand: Maybe you’re an existing content creator, coach, or business owner looking to add structured learning into your ecosystem. A course can serve as a cornerstone offering that complements your blog, YouTube channel, or consulting services.
- Scaling impact beyond one-on-one settings: If you’re used to teaching or coaching individuals, a course allows you to help more people at once, without sacrificing quality or personalization—especially when paired with supportive materials or communities.
Your “why” will shape every part of your course—from the tone of your content and the learning path you design, to your platform choice and marketing strategy. Take time to get honest about your goals. This clarity will act as a compass when decisions get overwhelming or when you’re evaluating whether your course is staying true to its intended purpose.
Identify Your Target Audience
Not all learners are the same, and a course that tries to appeal to everyone often ends up resonating with no one. The more specific you can be about your audience, the more focused and useful your content will become.
Begin by imagining your ideal learner:
- What is their background?
- What level of knowledge or experience do they already have in your subject?
- Are they beginners, intermediates, or advanced learners?
Understanding your audience’s current skill level helps you determine where your course should begin. If your course is too advanced, beginners may feel lost. If it’s too basic, experienced learners may get bored and drop off.
Next, identify the core problem your audience is trying to solve. People take online courses to improve their lives or work—whether that’s learning a new skill to get a promotion, starting a business, or exploring a personal interest. Pinpointing the exact problem helps you create content that feels personalized and high-impact.
Also, consider your audience’s motivations and expectations:
- Are they looking for quick wins or in-depth mastery?
- Do they prefer visual or text-based learning?
- Are they learning out of passion, professional growth, or necessity?
Once you’ve mapped these insights, build a learner persona—a fictional profile that embodies your target student. This persona will serve as a reference point throughout your course development.
Ultimately, when you understand who you’re teaching, you’re able to:
- Use the right tone and language
- Choose the most effective teaching methods
- Focus on the lessons that matter most to them
This leads to better engagement, higher completion rates, and more positive outcomes for everyone involved.
Choose a Clear Learning Outcome
Your course must promise a transformation. Without a clear and compelling outcome, learners may feel unsure about what they’re signing up for—and may lose motivation along the way. A well-defined learning outcome gives direction to your content and sets expectations for both you and your students.
Think of it as the north star for your course development process. Everything you build—from lessons and quizzes to assignments and community discussions—should align with this outcome.
Here’s what makes a good learning outcome:
- Specific: Avoid vague objectives like “understand social media.” Instead, aim for “learn how to schedule a month’s worth of social media content using automation tools.”
- Measurable: Learners should be able to assess whether they’ve achieved the outcome. This helps them stay motivated and gives you a benchmark to evaluate course success.
- Action-oriented: Use verbs like “create,” “build,” “design,” “analyze,” or “apply” to indicate what learners will be able to do.
Examples of strong learning outcomes:
- “Learn how to design a WordPress website from scratch using a page builder.”
- “Master basic conversational Spanish in 30 days for everyday travel situations.”
- “Create and manage a monthly budget using Excel templates.”
- “Develop a personal brand strategy tailored for LinkedIn networking.”
Once you’ve defined the learning outcome, use it as a filter during the content creation. If a module doesn’t contribute to that outcome, consider reworking or removing it. This keeps your course streamlined and ensures every component adds value.
Learners who know what they’re working toward are likelier to stick with your course, complete it, and apply what they’ve learned. That’s the kind of impact that makes your course stand out in a crowded digital landscape.
Map Out the Course Structure
Once your goals and audience are clearly defined, the next step is to sketch out the overall framework of your course. Think of this as creating the blueprint that will guide the entire learning journey. Without a structure, even the most valuable content can become overwhelming or disorganized for your learners.
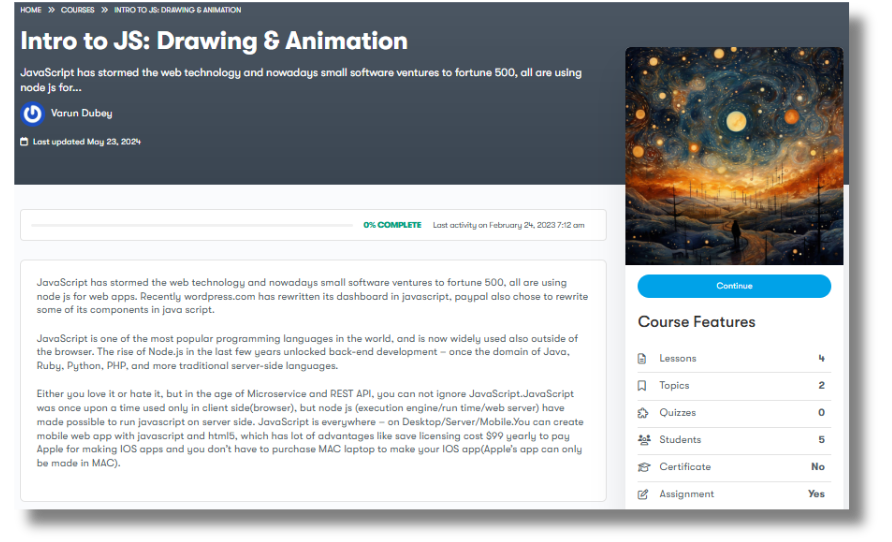
Start by breaking your course into modules. Each module should represent a major milestone or theme related to your course topic. Modules serve as high-level containers that keep related content grouped, making it easier for learners to follow your flow.
Within each module, outline the lessons. These are the individual teaching units where concepts are explained in focused, digestible formats. Lessons should be short enough to maintain attention but rich enough to cover one idea thoroughly. If you can, stick to a single learning objective per lesson.
To reinforce learning, plan a variety of activities:
- Quizzes to test comprehension
- Assignments that allow learners to apply what they’ve learned
- Discussion prompts that encourage reflection or peer interaction
- Case studies or examples that show real-world application
This is also the point where you decide the sequence—what comes first, and why? Build logically from foundational ideas to more advanced topics. Consider whether some modules depend on knowledge from earlier ones. A well-sequenced course builds momentum and ensures that learners stay confident and motivated.
As you structure your course, keep these guiding questions in mind:
- Is the flow intuitive and progressive?
- Are lessons evenly distributed, or are some sections too heavy?
- Does each part connect to the course’s main learning outcome?
A thoughtfully structured course is not only easier to teach—it’s far more effective for learners. It reduces cognitive overload, improves retention, and encourages steady progress.
Also Read: 10 Best Brightspace Alternatives
Select Your Course Format
Once your structure is outlined, it’s time to decide how you’ll deliver your content. The format you choose plays a major role in how learners engage with your material—and how effectively they absorb it.
Your format should align with two main factors: the nature of your content and the preferences of your target audience. For example, if you’re teaching hands-on software skills, video screen recordings might be ideal. If you’re sharing theory or strategy, written modules with diagrams could work best.
Here are some common course formats to consider:
- Video-based lessons: Ideal for visual and auditory learners. You can appear on camera, use screen shares, or create whiteboard-style animations. These are highly engaging but require more production effort.
- Text-based modules with visuals: Great for learners who prefer reading or need more flexibility. Supplement with images, diagrams, or infographics to enhance understanding.
- Slide presentations with voiceovers: A solid middle ground between video and text. This format allows for visual storytelling with the added benefit of verbal explanation.
- Interactive quizzes and projects: Useful for reinforcing learning and offering a hands-on experience. These are especially effective in technical or creative subjects.
Don’t feel pressured to choose just one format. Mixing formats can increase engagement and cater to diverse learning styles. For example, you might open each module with a short video, follow it with a reading or worksheet, and end with a quiz or assignment.
Also, consider practical factors:
- What tools and resources do you have for content creation?
- Are there accessibility needs in your audience?
- How will your content appear on different devices (desktop, tablet, mobile)?
The format isn’t just about presentation—it’s about helping your learners retain and apply what they’ve learned. The more thoughtfully you approach this, the more impactful your course will be.
Determine Course Length and Pacing
More content isn’t always better. One of the most common mistakes new course creators make is trying to cram too much information into a single course. While it might seem like you’re delivering more value, overwhelming learners can lead to frustration, dropouts, and poor retention.
Start by defining your total course duration. This could mean a 90-minute crash course, a 4-week bootcamp, or a self-paced program spanning several months. Base this decision on:
- The complexity of your topic
- The time your audience realistically has to commit
- The learning outcome you’ve promised
Next, decide on the time commitment per module or week. Will your learners need to dedicate 30 minutes a day? Or 2 hours per week? Setting clear expectations up front helps learners plan their time and stay on track.
Also consider the course delivery style:
- Fixed schedule (cohort-based): Everyone moves through the course at the same pace. This model is great for building community and accountability, but requires regular facilitation.
- Self-paced: Learners can access all content immediately and progress at their own speed. This offers flexibility, especially for busy professionals or international students in different time zones.
If you’re opting for a self-paced course, ensure each unit is digestible and clearly labeled. Break lessons into short chunks—ideally 5 to 10 minutes each—and provide guidance on how to move through the material. Avoid information overload by focusing on one key concept per lesson.
You can also add pacing aids like:
- Suggested timelines for each module
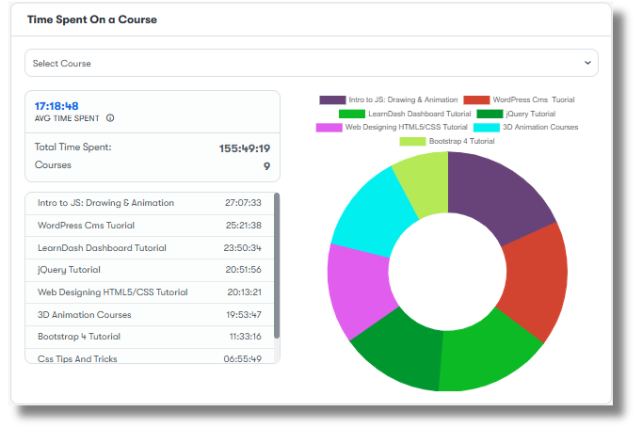
- Progress bars or trackers
- Email reminders or nudges to continue learning
Pacing isn’t just about time—it’s about creating a smooth learning rhythm that balances challenge with confidence. A well-paced course keeps learners engaged and increases the chances they’ll reach the finish line.
Create an Engagement Plan
Online learners can easily drop off if they feel lost, disconnected, or unmotivated. That’s why it’s essential to build an engagement strategy early in your planning process. Engagement isn’t just about keeping people entertained—it’s about creating a supportive learning environment that keeps students interested and involved from start to finish.
Here are some key components of an effective engagement plan:
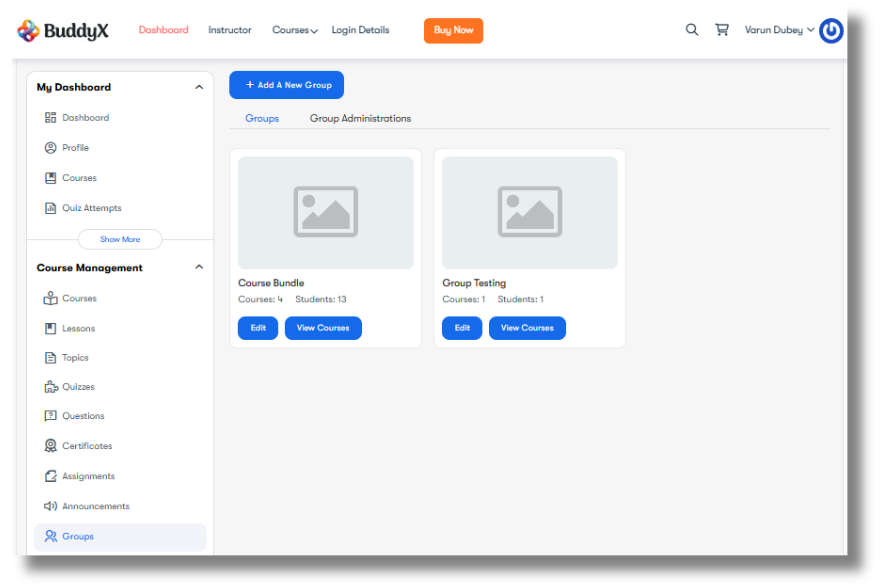
- Community interaction: Consider adding a forum, discussion board, or private group (e.g., Facebook, Discord, or BuddyBoss) where learners can ask questions, share experiences, and support one another.
- Consistent communication: Send regular updates, lesson reminders, or weekly tips via email or platform notifications to maintain momentum.
- Milestones and rewards: Break your course into sections with visual progress tracking, and offer certificates, digital badges, or even simple acknowledgments to keep learners motivated.
- Live sessions or check-ins: If possible, include optional live Q&A sessions, office hours, or webinars to build stronger connections and provide personalized support.
When learners feel seen and supported, they’re much more likely to complete the course and recommend it to others. Engagement is the glue that holds everything together.
Think About Assessment and Feedback
To ensure your course is truly effective, it’s important to build in checkpoints where both you and your learners can evaluate progress. Assessment and feedback are not just academic add-ons—they’re tools to improve comprehension, boost confidence, and increase course satisfaction.
Consider a mix of the following:
- Quizzes and tests: Short, interactive quizzes after lessons help reinforce key concepts.
- Assignments or projects: Encourage learners to apply what they’ve learned in practical, real-world scenarios.
- Peer review or group activities: Facilitate collaborative learning experiences and shared insights.
- Surveys and polls: Collect ongoing feedback about the content, structure, and learning experience. Use this data to make continuous improvements.
Not every assessment needs to be formal. Even quick reflection prompts like “What was your biggest takeaway from this module?” can deepen learning and enhance engagement.
Gather Your Content Resources
Before you jump into recording or writing your lessons, spend time gathering and organizing your content resources. A strong foundation here can save you hours later and help keep production smooth and stress-free.
Ask yourself:
- Are there existing materials—slides, videos, blog posts, tutorials—you can repurpose or update?
- Do you need to create new content from scratch, such as worksheets, scripts, or templates?
- Will your course benefit from curated resources, like external articles, research papers, or case studies?
Organize everything into folders by module or lesson, and create a checklist of what still needs to be produced. The more prepared you are before production, the easier it will be to maintain consistency and quality throughout the course.
Choosing a Platform to Build Your Course
Once your plan is ready, it’s time to turn ideas into reality. You’ll need a reliable and flexible platform to bring your course to life—one that supports your structure, content style, and learner needs.
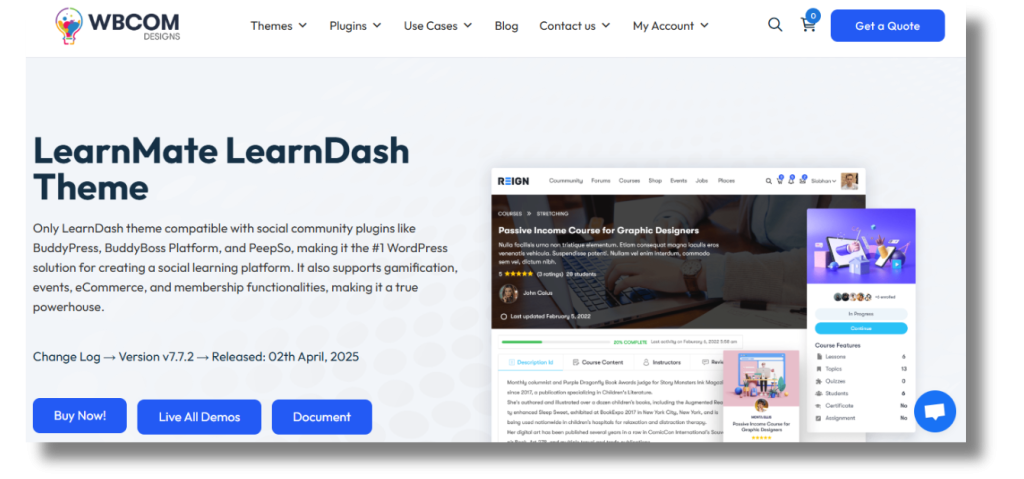
A widely used and adaptable option is a WordPress-based learning management system, especially when paired with tools like LearnMate LearnDash. This setup allows you to design and manage your course content without needing advanced technical skills.
LearnMate LearnDash combines the intuitive content-building features of WordPress with the powerful learning tools of LearnDash. With this setup, you can:
- Organize lessons and modules using a drag-and-drop course builder
- Add engaging quizzes, certificates, and interactive assignments
- Customize the learning interface to reflect your branding
- Integrate community forums or discussion spaces to boost engagement
Because it’s built on WordPress, you’re also free to extend functionality with thousands of plugins—ranging from payment gateways and analytics to gamification features and email automation.
Ultimately, while platforms like LearnMate LearnDash provide the structure, your planning and content decisions are what truly drive the course experience. Choose a platform that complements your teaching style, supports your learners’ needs, and grows with your goals.
Prepare for Launch
Before going live, take time to test and refine:
- Review all lessons for clarity, flow, and functionality
- Test quizzes, downloadable files, and navigation on different devices
- Invite a small group of beta users to experience the course and offer feedback
Fix any technical issues and refine based on this early input. A polished and user-friendly launch builds trust and can turn first-time learners into long-term advocates.
Post-Launch: Evaluate and Evolve
Once your course is live, the journey doesn’t stop. The best online courses are those that continuously improve.
- Monitor analytics to track engagement, completion rates, and drop-off points
- Read through learner reviews and feedback forms
- Update outdated materials, expand modules, or add bonus content
Also consider running periodic live sessions, AMAs (ask me anything), or community challenges to keep your learners coming back and staying engaged.
Planning doesn’t end with launch—it evolves into ongoing optimization to keep your content valuable and relevant.
Creating a Successful Online Course
Successfully creating an online course starts long before the first lesson is recorded. Proper planning—from defining goals and understanding your audience to structuring content and choosing the right tools—lays the groundwork for long-term success.
Tools like LearnMate LearnDash can streamline course delivery, but it’s your thoughtful design, strategic planning, and learner-centered approach that truly make the difference.
So take your time, plan with purpose, and build something that genuinely helps people grow.
Interesting Reads:
Mastering LearnDash: A Comprehensive Guide


