Restrict Content is a plugin that lets you restrict content across a membership website. It makes it easy for administrators to restrict content based on user roles, and it separates logged-in and non-logged-in users so you have full control over who can view or access content on your WordPress website.
The plugin lets you build different pages with customized functions using very little code. For example, you can easily create login, registration, and password-recovery pages with Restrict Content. With 10,000+ active installations, it’s well suited for limiting access to media, custom post types, pages, and API requests.
Within Your Membership Site, Restrict Content Helps You:
- Separate private and public content
- Protect content accordingly
- Let new users register
- Gather emails
- Restrict an entire page or just a specific section of it
- Control and manage user access
You can also upgrade to Restrict Content Pro for additional features on your membership site, either upgrade the free version or download the Pro one directly.
Also Read: Best WordPress BuddyPress Events Plugins
Features of Restrict Content
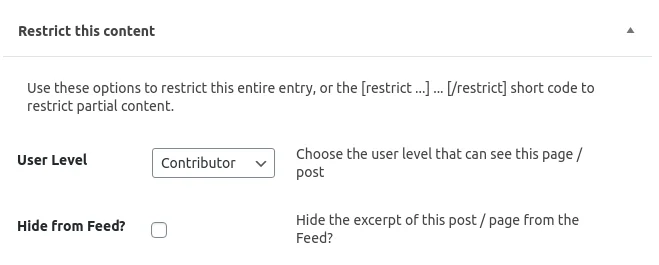
- Limits access to content and shows a “This content is limited to logged-in users” message.
- Limits content according to the user’s role.
- Displays the registration form to new users on every page of the website.
- Displays the login form to existing users everywhere on the website.
- Sends messages to users who don’t meet the required criteria.
- Lets you hide or restrict content in RSS feeds.
Restrict Content Pro Features
Restrict Content Pro adds a set of features on top of the free plugin:
- Unlimited membership levels
- Several payment gateways, including PayPal, Stripe, and Authorize.net
- Integration with AffiliateWP
- Third-party add-ons
- Custom integrations
- Limit access to WooCommerce products
Installing Restrict Content
Follow these steps:
- Download the plugin from wordpress.org, or buy the Pro pack from restrictcontentpro.com.
- Go to WordPress Dashboard > Plugins > Add New, click Upload Plugin, select restrict-content-pro.zip, and install it.
- Go to WordPress Dashboard > Plugins and click Activate.
Also Read: Why Community Management Matters For Your Business?
Setting Up Restrict Content
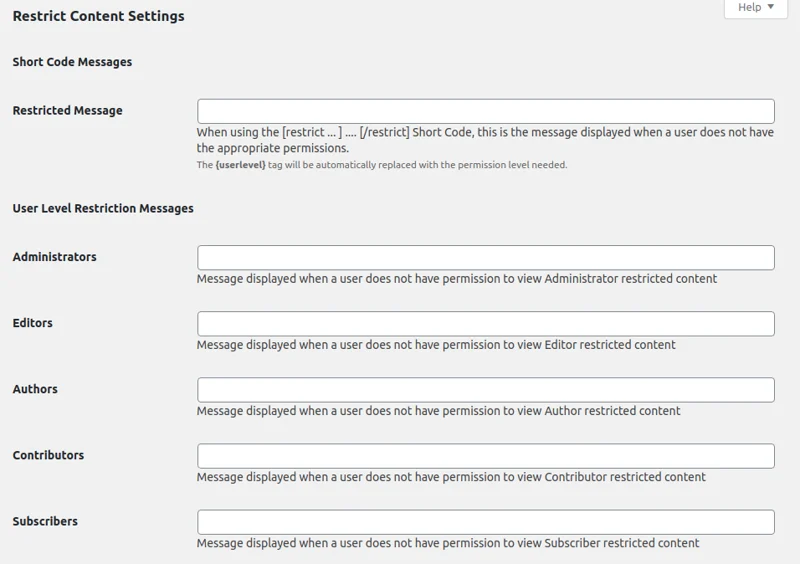
After installation, follow these steps to configure the plugin:
- Go to WordPress Dashboard > Restrict > Settings.
- On the General tab, make changes to the settings as needed.
- Set up payment options for different membership levels on the Payment tab.
- Click Save Options once you’re done.
Restricting Your Content
Once the plugin is installed and configured, you’ll see a checkbox on every page, post, and custom post type. Here’s how to restrict content based on user roles:
- Go to WordPress Dashboard > Posts > Restrict Access.
- Under Members access, select Members of membership level.
- Mark the membership levels you want to limit access to.
- Select the user role that should have access.
- Click Save to restrict the content.

Interesting Read:
How to Establish Trust in your Marketplace Community?
Free Ways to Gain Instant Website Traffic
Factors to Consider Before Hiring a Web Development Firm for an Ecommerce Venture