How to Add a Forum to Your WordPress Site (Step-by-Step Guide for 2026)

Your WordPress site has blog posts, pages, maybe a contact form. But there is no place for your visitors to talk to each other. No way for customers to ask questions and get answers from other customers. No space for your community to actually feel like a community.
Adding a forum fixes that. A well-built discussion forum turns passive readers into active participants. It creates a library of user-generated content that helps with SEO. And it gives you a direct line to what your audience actually cares about.
This guide walks you through the entire process of adding a forum to WordPress, from choosing the right approach to configuring your first spaces and publishing your first topic. No fluff, no filler. Just the steps.
Why Your WordPress Site Needs a Forum
Before we get into the how, let’s talk about the why. Because adding a forum is not a small decision. It changes the dynamics of your site.
Here are the real reasons site owners add forums:
- Reduce support load. When customers can search existing answers and ask questions publicly, your support team handles fewer repetitive tickets. One good answer helps hundreds of future visitors.
- Build organic traffic. Every forum topic is a new page. Every reply adds content. Over time, forums generate thousands of long-tail keyword pages that rank in Google without you writing a single blog post.
- Increase retention. People who participate in community discussions come back more often than people who just read blog posts. A forum gives them a reason to return.
- Gather product feedback. Forums surface feature requests, bug reports, and ideas you would never hear through a contact form. Your community tells you exactly what they want.
- Establish authority. A thriving forum signals expertise. Visitors see active discussions and think: these people know what they are talking about.
If any of these resonate with your situation, a forum is worth the effort. Let’s set one up.
The Three Approaches to WordPress Forums
There are three ways to add a forum to WordPress. Each has trade-offs.
1. Use a Plugin (Recommended)
A dedicated forum plugin installs directly into your WordPress dashboard. Your forum lives on the same domain, shares the same user accounts, and uses the same theme. This is the approach most site owners should take.
The advantages are clear: single login for users, full control over your data, no monthly SaaS fees, and tight integration with the rest of your WordPress site.
2. Use a Third-Party Platform
Services like Circle, Mighty Networks, or Discourse host your forum on their servers. You get a forum, but it lives on a separate domain (or subdomain), requires separate user accounts, and costs a monthly fee.
This makes sense if you want zero server management and don’t mind the disconnect between your main site and your community. But you lose SEO value, data ownership, and the seamless user experience.
3. Build a Custom Solution
You could build forum functionality from scratch using custom post types, taxonomies, and templates. This gives you total control but requires significant development time and ongoing maintenance.
Unless you have very specific requirements that no plugin can meet, this is overkill for most projects.
For the rest of this guide, we are going with approach #1, a WordPress forum plugin. It is the sweet spot of power, flexibility, and simplicity.
Choosing the Right Forum Plugin
The WordPress plugin directory has several forum options. Here is an honest look at the landscape in 2026:
bbPress
bbPress was the default answer for years. Built by Automattic, tightly integrated with WordPress. But it stores everything in wp_posts and wp_postmeta, which means performance degrades badly at scale. Development has slowed significantly. If you are starting fresh in 2026, there are better options.
wpForo
wpForo uses custom database tables (good for performance) and has a solid feature set. The downside is that the interface looks dated, and many features require paid add-ons.
Jetonomy
Jetonomy is a newer forum plugin built from the ground up with modern WordPress architecture. It uses 24 custom database tables for performance, the WordPress Interactivity API for the frontend (no jQuery or React bundles), and a three-layer permission system with trust levels. It supports four community types, Forums, Q&A, Ideas, and Social Feed, in a single plugin.
For this tutorial, we will use Jetonomy because it covers the most ground with the least setup. But the general process applies regardless of which plugin you choose.
Step 1: Install and Activate the Plugin
Log in to your WordPress admin dashboard and navigate to Plugins → Add New.
Search for Jetonomy. Click Install Now, then Activate.
That is it. No configuration files to edit. No FTP uploads. The plugin creates its database tables automatically on activation.
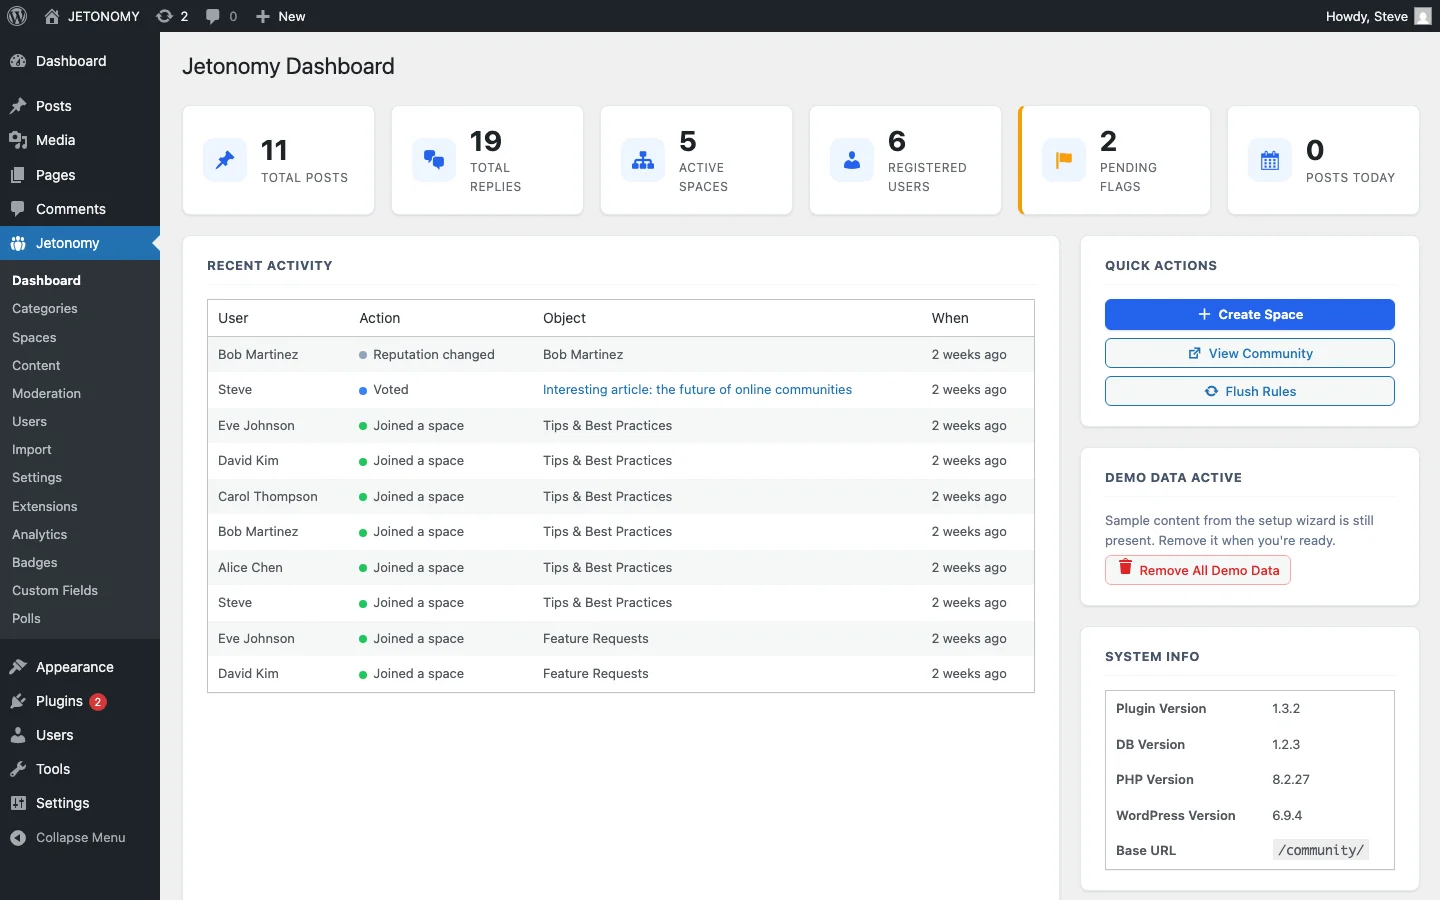
Step 2: Run the Setup Wizard
After activation, Jetonomy redirects you to its setup wizard. The wizard walks you through four decisions:
- Base URL, Where your forum lives. The default is
/community/, so your forum URL becomesyoursite.com/community/. You can change this to/forum/,/discuss/, or whatever fits your brand. - Community Type, Choose your primary format: Forum (threaded discussions), Q&A (questions with votable answers), Ideas (feature requests with roadmap), or Social Feed (lightweight posts). You can mix types later, each space can have its own type.
- Default Spaces, The wizard creates starter spaces like General Discussion, Help & Support, and Feature Requests. You can rename or delete these later.
- Demo Data, Optionally load sample posts, replies, and users so you can see how the forum looks with real content. Recommended for your first setup so you are not staring at empty pages.
Click Finish Setup and your forum is live.
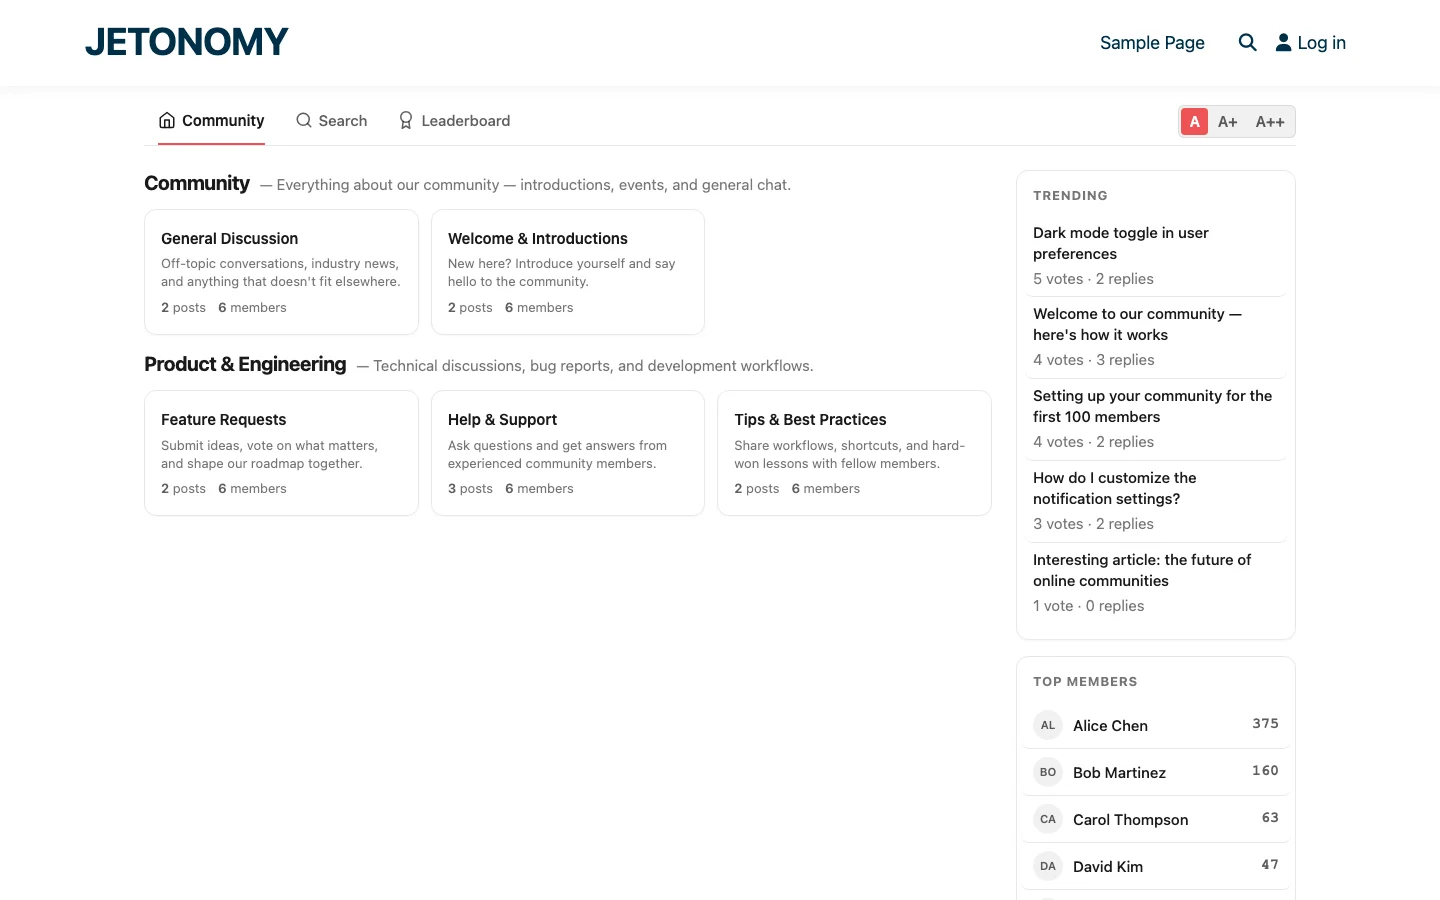
Step 3: Configure Your Categories and Spaces
Forums are organized into Categories and Spaces:
- Categories are top-level organizational groups. Think of them as sections of your forum. Example: “Product”, “Community”, “Off-Topic”.
- Spaces are the actual discussion areas inside categories. Each space has its own topic list, members, and settings. Example: under the “Product” category, you might have spaces for “Feature Requests”, “Bug Reports”, and “How-To Guides”.
Go to Jetonomy → Categories in your admin sidebar. Create your top-level categories first, then go to Jetonomy → Spaces to create spaces within each category.
For each space, you will configure:
- Space type, Forum, Q&A, Ideas, or Social
- Join policy, Open (anyone can post), Request to Join (approval required), or Invite Only
- Description, A short explanation that appears on the space card
A good starting structure for most sites:
| Category | Spaces | Type |
|---|---|---|
| Community | General Discussion | Forum |
| Community | Welcome & Introductions | Forum |
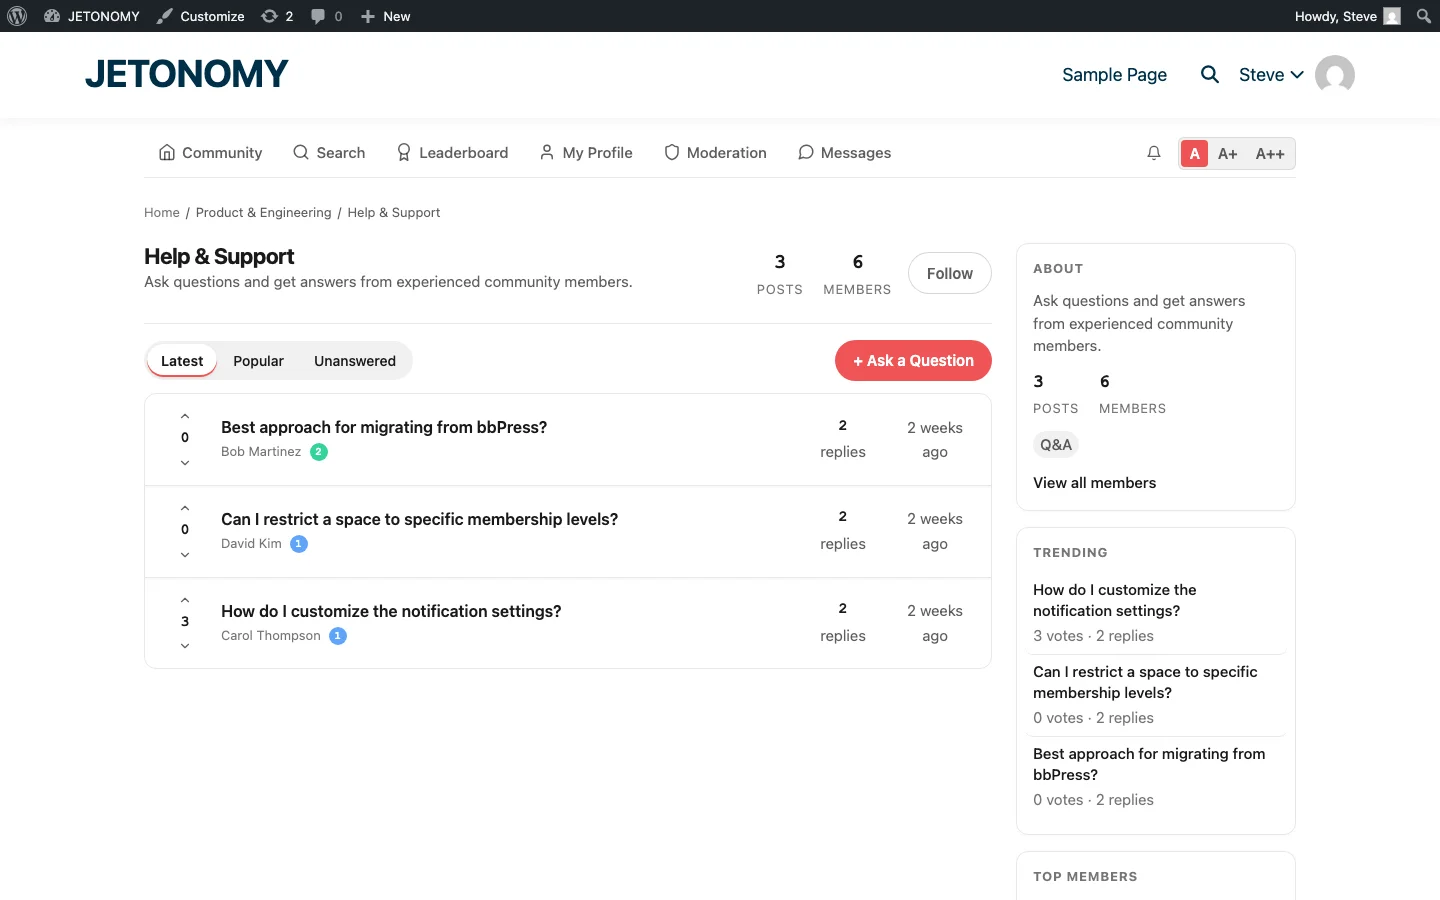
| Product | Help & Support | Q&A |
| Product | Feature Requests | Ideas |
| Product | Tips & Best Practices | Forum |
Step 4: Set Up Permissions and Trust Levels
This is where most forum setups go wrong. Either permissions are too loose (spam everywhere) or too tight (nobody can post). Jetonomy solves this with a three-layer system:
Layer 1: WordPress Capabilities
Administrators and editors get full forum access by default. Subscribers get participant access. This maps to roles you already understand.
Layer 2: Space Roles
Each space has its own owner, moderators, and members. A space owner can moderate their space without being a WordPress admin. This is crucial for scaling, you cannot moderate every conversation yourself.
Layer 3: Trust Levels (0–5)
This is the game-changer. New users start at Trust Level 0 with limited abilities. As they participate, posting topics, receiving upvotes, being active over time, Jetonomy automatically promotes them through levels 1, 2, and 3.
Higher trust levels unlock more abilities:
- Level 0, Can read and post, but with rate limits
- Level 1, Can send private messages, upload images
- Level 2, Can edit their own posts, flag content
- Level 3, Can recategorize topics, close discussions
- Levels 4 & 5, Granted manually to trusted community leaders
You configure the thresholds in Jetonomy → Settings → Trust Levels. The defaults work well for most communities, but you can tighten or loosen them based on your audience.
This system is your best defense against spam. New accounts can post, but they cannot flood the forum. Genuine contributors naturally earn more abilities over time. You can read more about this approach in our guide on building a self-moderating forum with trust levels.
Step 5: Customize the Appearance
One concern site owners have about forum plugins is that they will look out of place on their site. Forums that clash with your theme hurt the user experience.
Jetonomy handles this by inheriting styles from your active theme automatically. It reads your theme’s theme.json settings, fonts, colors, border radius, spacing, and applies them to the forum through CSS custom properties. This means the forum matches your theme without you writing custom CSS.
If you want to go further, every template in Jetonomy is overridable. Copy any template file from plugins/jetonomy/templates/ to your-theme/jetonomy/ and customize it. The plugin will use your theme’s version automatically.
The forum also includes three text size options (A, A+, A++) for accessibility, and the responsive layout works down to 390px viewport width.
Step 6: Create Your First Topic
Your forum is installed, configured, and styled. Time to seed it with content.
Do not launch an empty forum. An empty forum tells visitors: nobody uses this. Seed it with at least 3–5 topics per space before you announce it publicly.
Good seed topics include:
- A welcome post explaining what the forum is for and how to participate
- A frequently asked question with a detailed answer
- A “What would you like to see?” topic to invite early feedback
- A tips post sharing something genuinely useful
Navigate to any space and click the New Topic button (or Ask a Question in Q&A spaces). The editor supports rich text formatting, image uploads (drag and drop or paste from clipboard), @mentions, code blocks with syntax highlighting, and auto-embedding for YouTube, Twitter, and other oEmbed URLs.
Step 7: Add Navigation to Your Forum
Your forum needs to be easy to find. Here are the recommended navigation changes:
- Main menu, Add a “Community” or “Forum” link to your primary navigation menu. Go to Appearance → Menus and add a custom link to your forum base URL.
- Footer, Add the forum link to your footer menu.
- Homepage, If community is central to your site, add a section on your homepage highlighting recent discussions or popular topics.
If you are running a BuddyPress community site, Jetonomy integrates directly with BuddyPress groups and member profiles, so your forum appears as a native tab in the existing community structure.
Step 8: Configure Notifications and Email
Users need to know when someone replies to their topic or mentions them. Jetonomy includes a built-in notification system with both on-site notifications (the bell icon in the nav bar) and email notifications.
Configure email settings in Jetonomy → Settings → Email:
- Set the “From” name and email address
- Choose which events trigger email notifications (new reply, mention, topic update)
- Customize email templates if needed
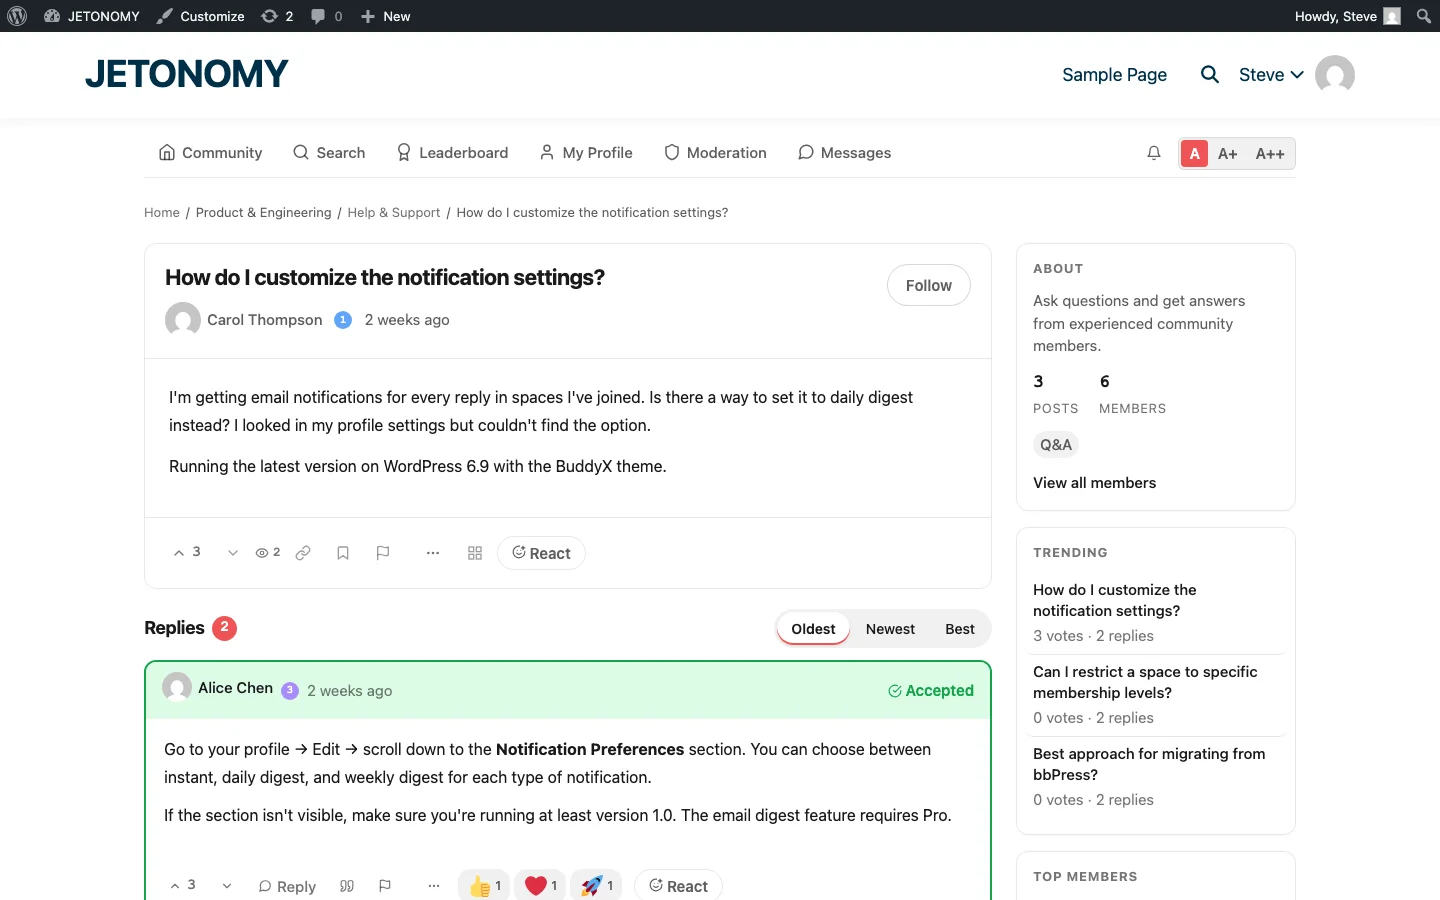
Users can control their own notification preferences from their profile settings, choosing between instant, daily digest, or weekly digest for each notification type.
Step 9: Set Up Search
As your forum grows, search becomes essential. Jetonomy includes full-text search out of the box, powered by MySQL FULLTEXT indexes on topic titles, post content, and reply content.
Users can search from the search page or use the keyboard shortcut / (forward slash) to open search from anywhere in the forum. Results update as you type, showing matches across all spaces.
For sites with thousands of posts, consider adding a dedicated search solution like Elasticsearch through Jetonomy’s adapter system. But for most forums, the built-in search handles tens of thousands of posts without breaking a sweat.
Step 10: Launch and Promote Your Forum
Your forum is ready. Here is how to launch it without crickets:
- Invite your most engaged users first. Email your top commenters, newsletter subscribers, or existing customers. A forum with 10 active members looks alive. A forum with 0 members looks dead.
- Write a blog post announcing the forum. Explain why you created it, what people can discuss there, and how to get started.
- Link from existing content. Go through your most popular blog posts and add calls to action: “Have a question about this? Ask in our community forum.”
- Respond quickly to early posts. For the first few weeks, reply to every topic within hours. Early participants need to feel heard.
- Create invite links. Jetonomy lets you generate invite links with configurable expiry dates. Share these in emails, social media, or Slack communities.
What Comes Next
Once your forum is running, here are the next steps to consider:
- Moderation, Set up auto-moderation rules to catch spam and inappropriate content before it goes live. Read our guide on building a content moderation workflow for best practices.
- Gamification, Add badges and leaderboards to reward active members and encourage participation.
- Analytics, Track community health with post counts, active users, engagement rates, and response times. Jetonomy Pro includes a built-in analytics dashboard.
- SEO, Forum content ranks well in search engines because it is question-and-answer format content that matches how people search. Make sure your forum URLs are clean and your site has a proper sitemap.
- Migration, If you are currently using bbPress, wpForo, or Asgaros, Jetonomy includes one-click importers for all three. Your posts, replies, and user data move over cleanly.
Common Mistakes to Avoid
After helping dozens of sites set up forums, these are the mistakes I see most often:
- Launching with too many spaces. Start with 3–5 spaces. You can always add more. Too many empty spaces make the forum feel abandoned.
- Not seeding content. Load demo data or write seed posts before going public. Nobody wants to be the first person to post in an empty room.
- Ignoring permissions. Default settings work for small communities, but as you grow, you need trust levels and moderation tools. Set these up before you need them.
- Hiding the forum. Put it in your main navigation. If people cannot find it, they will not use it.
- Expecting instant activity. Forums grow slowly. The first month is the hardest. Keep posting, keep responding, and activity compounds over time.
Wrapping Up
Adding a forum to WordPress is one of the highest-leverage changes you can make to your site. It turns one-way content into two-way conversations. It builds a searchable knowledge base. It creates the kind of community that keeps people coming back.
The technical setup takes about 15 minutes. The real work is in nurturing the community that grows inside it. Start small, respond quickly, and let your members shape what the forum becomes.
If you are ready to get started, download Jetonomy from the WordPress plugin directory and follow the steps above. Your community is waiting.
Implementation details that make the rollout smoother
How to Add a Forum to Your WordPress Site (Step-by-Step Guide for 2026) fits into the broader forums category through launch plans, migration steps, and setup choices. That matters because the technical setup is only one part of success. The way you structure spaces, roles, onboarding, and follow-up is what determines whether the forum becomes a searchable asset or just another neglected section of the site.
- Start with one public space and one private operator space so you can test permissions before the wider launch.
- Seed the first discussions yourself using the exact questions customers already ask in email, pre-sales chat, or onboarding calls.
- Define who can create spaces, who can moderate them, and what counts as an accepted answer before the first wave of members arrives.
Why teams evaluating this setup should look at Jetonomy Pro
Jetonomy Pro is useful here because it gives you Q&A, discussion spaces, trust levels, private areas, and a cleaner launch path than stitching together older forum plugins. If you want to know more and try Jetonomy, take a closer look at Jetonomy Pro. It is the most direct next step for teams that want to move from theory to an actual working WordPress community experience.
For articles like this one, the practical question is not only whether the approach works in theory. It is whether your chosen forum stack gives you the moderation depth, user experience, and extensibility to keep the system useful six months after launch. That is where a more complete product decision starts to matter.